
Building a high-end PC rig in 2026 demands meticulous attention to every component, and the Power Supply Unit (PSU) is unequivocally the most underestimated. A suboptimal PSU choice can lead to system instability, component degradation, and even catastrophic hardware failure. Our objective here is to ensure your cutting-edge CPU and GPU receive clean, stable, and sufficient power, allowing them to operate at peak performance without compromise.
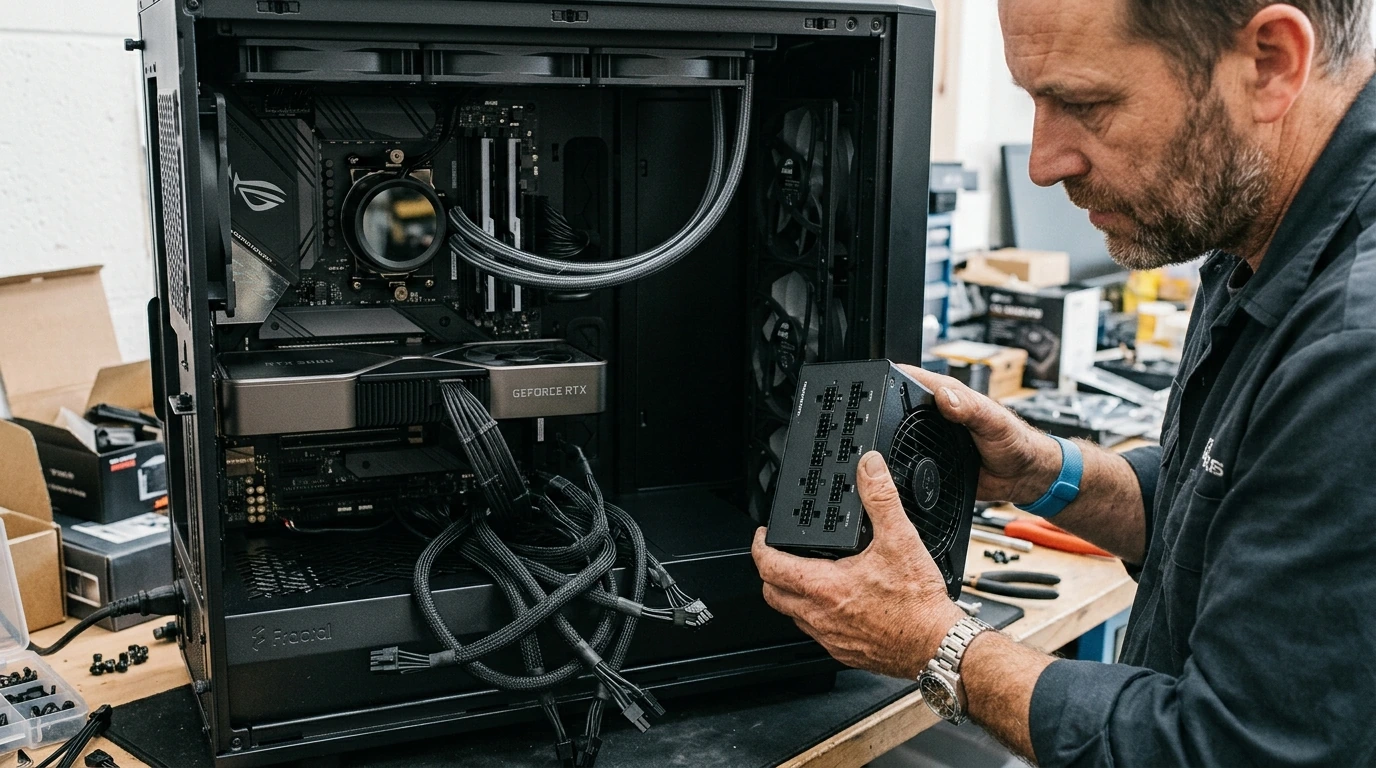
KEY TAKEAWAYS
- Wattage Calculation: Always factor in CPU, GPU, and a 15-20% buffer for future upgrades and transient power spikes.
- 80 PLUS Efficiency: Prioritize Gold, Platinum, or Titanium ratings for reduced heat, lower power bills, and superior component longevity.
- Modularity & Form Factor: Opt for fully modular PSUs for cleaner builds and easier cable management, ensuring compatibility with your case.
- Brand & Protections: Choose reputable brands known for robust over-current (OCP) and over-voltage (OVP) protections to safeguard expensive components.
Required Prerequisites & Tools Checklist
Before selecting and installing your PSU, ensure you have the following:
- Your complete component list: Specifically, CPU model, GPU model (including factory overclock if applicable), motherboard, RAM quantity, storage drives (NVMe, SSD, HDD), and any additional PCIe cards or RGB accessories.
- PC Case Specifications: Confirm PSU form factor compatibility (ATX, SFX, SFX-L) and available length for the PSU itself, especially in compact builds.
- Wattage Calculator Access: Online tools like PCPartPicker or dedicated PSU calculators are invaluable.
- Phillips Head Screwdriver: For securing the PSU and potentially other components.
- Cable Ties/Velcro Straps: For effective cable management.
- Anti-static Wrist Strap (Recommended): To prevent electrostatic discharge damage.
Chronological Step-by-Step Procedural Guide
Step 1: Calculate Your System's Total Power Draw
The foundation of PSU selection is accurate wattage estimation. Do not simply guess. Modern CPUs and GPUs, particularly those from Intel's "Raptor Lake Refresh" and AMD's "Zen 5" architectures, coupled with NVIDIA's "Ada Lovelace Next" and AMD's "RDNA 4" GPUs, can exhibit significant transient power spikes that exceed their average TDP.
- Identify Core Component TDPs: Look up the Thermal Design Power (TDP) for your specific CPU and GPU models. For example, a high-end Intel Core i9-15900K might have a PBP (Processor Base Power) of 125W but a MTP (Maximum Turbo Power) exceeding 250W. A top-tier NVIDIA RTX 5090 could easily draw 450-600W under full load.
- Estimate Peripheral & Other Component Draw: Allocate approximately 50-100W for your motherboard, RAM, NVMe drives, HDDs, case fans, and RGB lighting. For systems with multiple NVMe drives, a RAID array, or extensive liquid cooling pumps, increase this estimate.
- Apply a Safety Buffer: Add a minimum of 15-20% to your calculated peak wattage. This buffer accounts for manufacturing tolerances, component aging, and particularly, those brief, high-current transient loads that can cause system crashes if the PSU can't supply the power instantaneously. For a system peaking at 800W, aim for a 920-960W PSU. It is generally safer to round up to the nearest common PSU wattage (e.g., 1000W).

Step 2: Evaluate 80 PLUS Efficiency Ratings
The 80 PLUS certification indicates a PSU's power efficiency at various load levels. Higher efficiency means less wasted energy as heat, leading to lower operating temperatures, reduced fan noise, and lower electricity bills over time. For high-end rigs, anything less than Gold is generally not recommended.
- Understand the Tiers:
- 80 PLUS Bronze: 82% efficiency at 20% load, 85% at 50% load, 82% at 100% load. (Avoid for high-end)
- 80 PLUS Silver: 85% efficiency at 20% load, 88% at 50% load, 85% at 100% load. (Avoid for high-end)
- 80 PLUS Gold: 87% efficiency at 20% load, 90% at 50% load, 87% at 100% load. (Minimum for high-end)
- 80 PLUS Platinum: 90% efficiency at 20% load, 92% at 50% load, 89% at 100% load. (Recommended for high-end)
- 80 PLUS Titanium: 92% efficiency at 10% load, 94% at 20% load, 96% at 50% load, 94% at 100% load. (Premium choice, highest efficiency)
- Optimal Load Range: PSUs operate most efficiently between 40-60% of their maximum rated load. Aim to size your PSU such that your typical peak gaming or workload falls within this range. For example, if your system draws 600W at peak, a 1000W PSU would operate at 60% load, maximizing its efficiency.
Step 3: Consider Modularity and Form Factor
Cable management and case compatibility are crucial for aesthetics, airflow, and ease of maintenance.
- Modularity Types:
- Non-Modular: All cables are permanently attached. (Generally only found on budget PSUs, avoid for high-end).
- Semi-Modular: Essential cables (24-pin ATX, 8-pin CPU) are attached, others are detachable. Offers a balance but can still lead to unused cables.
- Fully Modular: All cables are detachable. This is the gold standard for high-end builds, allowing you to connect only the cables you need, drastically improving cable management and airflow.
- Form Factor: Most high-end desktop PCs use ATX PSUs. However, if you're building in a Small Form Factor (SFF) case, you'll need an SFX or SFX-L PSU. Always verify the physical dimensions against your case's specifications.

Step 4: Research Brand Reputation and Internal Components
A PSU is only as good as its internal components and the quality control of its manufacturer. Do not compromise here.
- Reputable Brands: Stick to established manufacturers with a proven track record of reliability and excellent customer support. Brands like Seasonic, Corsair (RMx, HX, AX series), be quiet! (Dark Power Pro, Straight Power), EVGA (SuperNOVA G/P/T series), and Cooler Master (V Gold/Platinum) are generally considered top-tier.
- Internal Components: While difficult to assess without disassembling, professional reviews often detail the internal OEM (Original Equipment Manufacturer) and capacitor quality. Look for PSUs utilizing 100% Japanese capacitors, known for superior longevity and stability compared to Taiwanese or Chinese alternatives.
- Warranty: A longer warranty (7-10 years) is a strong indicator of a manufacturer's confidence in their product's durability.
Step 5: Verify Essential Protections
High-end components are expensive; safeguard them with a PSU that offers comprehensive protection circuits.
- OVP (Over Voltage Protection): Prevents damage from voltage spikes.
- UVP (Under Voltage Protection): Protects against insufficient voltage.
- OPP (Over Power Protection) / OLP (Over Load Protection): Shuts down the PSU if the total load exceeds its capacity.
- SCP (Short Circuit Protection): Crucial for preventing damage from short circuits.
- OCP (Over Current Protection): Prevents damage if current on a single rail exceeds safe limits.
- OTP (Over Temperature Protection): Shuts down the PSU if internal temperatures become too high.

Common Pitfalls & Critical Mistakes to Avoid During Execution
- Under-sizing the Wattage: The most common mistake. A PSU that is consistently operating at or near 100% load will run hotter, be less efficient, and significantly shorten its lifespan, potentially taking other components with it during failure. Transient power spikes from modern GPUs are particularly unforgiving.
- Ignoring 80 PLUS Rating: Opting for a cheaper, lower-efficiency PSU to save a few dollars upfront often results in higher electricity bills, more heat generation within the case, and louder fan noise, negating any initial savings.
- Neglecting Cable Management: While not directly a performance issue, poor cable management obstructs airflow, traps heat, and makes future maintenance a nightmare. Fully modular PSUs simplify this significantly.
- Buying Unknown Brands: "No-name" or obscure brands often cut corners on internal components and protection circuits. This is a false economy that puts your entire expensive rig at risk.
- Not Checking Case Clearance: Especially with high-wattage PSUs, physical length can be an issue in smaller ATX cases or any SFF build. Always measure.
PRO CALLOUT NOTE: ATX 3.0 & PCIe 5.0 Power Connectors
For high-end rigs featuring NVIDIA's RTX 40-series and AMD's RX 7000-series GPUs (and their 2026 successors), prioritize PSUs that adhere to the ATX 3.0 standard and include native 12VHPWR (PCIe 5.0) connectors. These connectors are designed to deliver up to 600W through a single cable, mitigating the need for multiple 8-pin adapters and providing robust transient power handling, crucial for preventing system crashes under extreme GPU loads. Adapters, while functional, introduce additional points of failure and bulk.
PSU Feature Comparison
Here's a quick comparison of key PSU features and their implications for a high-end build:
| Feature | Budget/Mid-Range PSU | High-End PSU (Recommended) |
|---|---|---|
| Wattage Buffer | 5-10% (often none) | 15-20% minimum |
| 80 PLUS Rating | Bronze, Silver | Gold, Platinum, Titanium |
| Modularity | Non-Modular, Semi-Modular | Fully Modular |
| Capacitor Quality | Mixed, often generic | 100% Japanese Capacitors |
| Warranty Duration | 3-5 years | 7-10+ years |
| Fan Noise | Audible at load | Silent/Zero-RPM mode, quiet at load |
| ATX 3.0/PCIe 5.0 Support | Rarely, requires adapters | Native 12VHPWR connector |
Post-Implementation Verification Checklist
After installing your chosen PSU, perform these checks to ensure optimal operation:
- System Stability Test: Run demanding benchmarks (e.g., Prime95 for CPU, FurMark for GPU, or a combined stress test like AIDA64 Extreme) for at least 30-60 minutes. Monitor for any crashes, freezes, or unexpected shutdowns.
- Voltage Monitoring: Use software like HWMonitor or HWiNFO64 to check 12V, 5V, and 3.3V rails. While software readings can have minor discrepancies, significant deviations (e.g., 12V dropping below 11.5V under load) indicate a potential issue.
- Temperature Monitoring: Ensure PSU temperatures (if sensors are available) and internal case temperatures remain within acceptable limits. Excessive heat can indicate poor airflow or an overworked PSU.
- Fan Noise Assessment: Listen for unusual fan noises from the PSU. Many high-end PSUs feature a "zero-RPM" mode where the fan doesn't spin under low loads, activating only when necessary.
- Cable Seating: Double-check all power connections (24-pin ATX, 8-pin CPU, PCIe, SATA) are firmly seated. Loose connections are a common cause of instability.

A Step-by-Step Guide to Setting Up Enterprise AI Chatbot Platforms for Your Business →
FAQ Section
- Q1: Can a PSU be "too powerful" for my system?
- A: While a PSU cannot be "too powerful" in the sense of damaging components, buying a significantly oversized unit (e.g., 1600W for a 600W system) means it will operate at a very low load percentage, potentially outside its peak efficiency curve. This can lead to slightly reduced efficiency and a higher upfront cost, but generally causes no harm.
- Q2: Is fan noise a significant concern for high-end PSUs?
- A: For high-end PSUs, fan noise is often minimized through larger, quieter fans (135mm or 140mm), fluid dynamic bearings (FDB), and zero-RPM modes. While some noise is inevitable under heavy load, a quality PSU will keep it to a minimum. Budget PSUs tend to have smaller, louder fans.
- Q3: How often should I replace my PSU?
- A: A high-quality PSU from a reputable brand, especially one with a 7-10 year warranty, can reliably last through multiple system upgrades. However, if you notice instability, unexpected shutdowns, or significant voltage fluctuations after several years, it may be time for a replacement. A PSU's lifespan is heavily influenced by operating temperature and load.
- Q4: Do I need a single-rail or multi-rail 12V PSU?
- A: For high-end systems, both single-rail and multi-rail PSUs can be excellent. Single-rail PSUs offer maximum current on the 12V line, simplifying power distribution. Multi-rail PSUs distribute the 12V output across several "virtual" rails, each with its own OCP, which can offer slightly better protection against component overcurrents. Modern high-quality PSUs of both types are safe and reliable; the choice often comes down to personal preference or specific component requirements.


No comments: