

A cluttered PC interior does more than just look messy; it restricts vital airflow, traps dust, and makes future hardware upgrades a frustrating chore. By taking a systematic approach to cable routing, you can lower system temperatures and transform a chaotic rat's nest into a clean, professional-looking build.
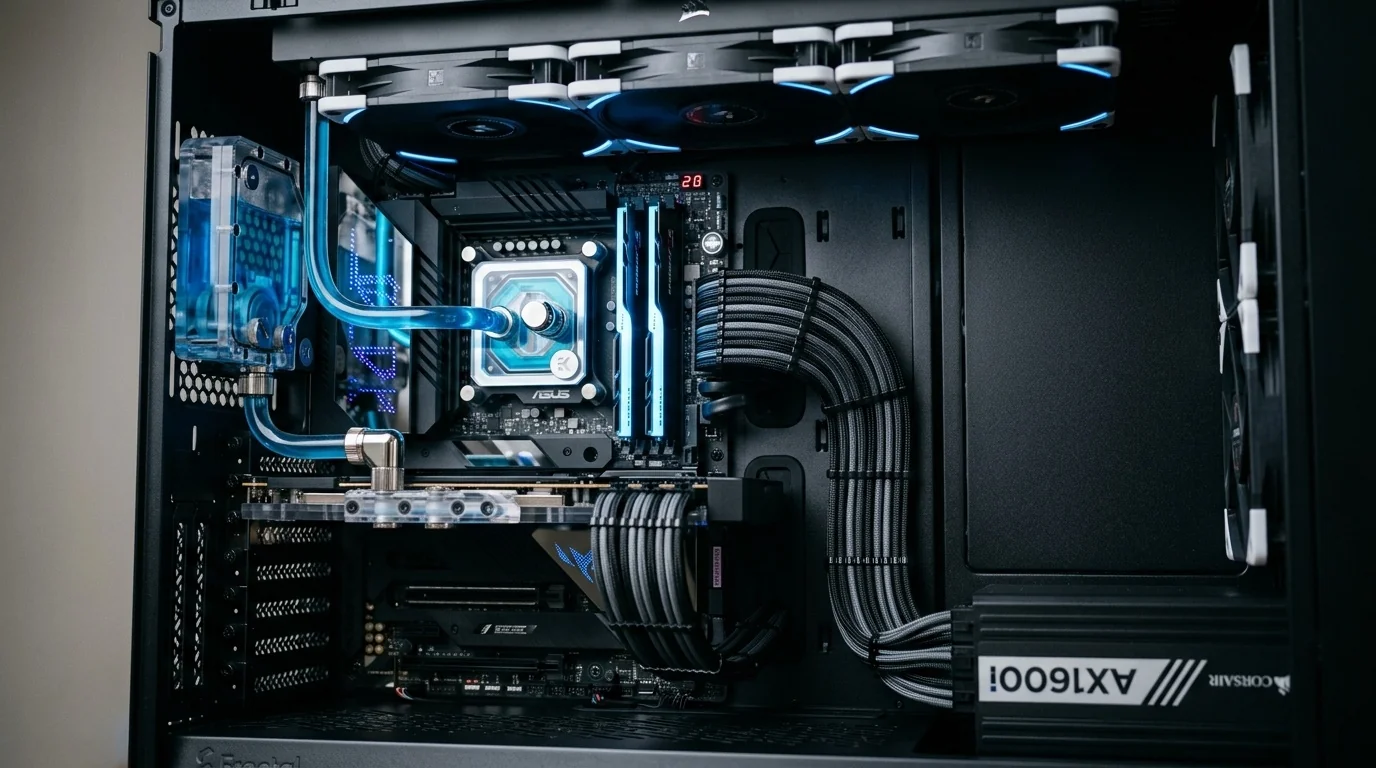
Key Takeaways
- Routing cables behind the motherboard tray is the single most effective way to clear the main chamber.
- Prioritize securing thick, rigid cables like the 24-pin ATX and 8-pin EPS power connectors first.
- Avoid over-tightening zip ties; hook-and-loop (Velcro) straps allow for easier adjustments and prevent cable damage.
- Proper cable management improves component accessibility and reduces dust accumulation over time.
The Real Impact of Cable Clutter: Airflow vs. Aesthetics
There is a common debate in the PC building community regarding how much cable clutter actually affects thermal performance. In large modern ATX cases, a few loose cables will not cause your CPU or GPU to overheat instantly. However, dense clusters of cables directly in front of intake fans block the cool air path, forcing your fans to run at higher RPMs to maintain stable temperatures. This results in a louder system and faster dust accumulation as dirt settles on the tangled wires.
Beyond cooling, aesthetics and maintenance are where cable management truly shines. A clean interior makes it incredibly easy to swap out a graphics card, add storage drives, or blow out dust with compressed air. If you have a tempered glass side panel, a tidy layout turns your hardware into a centerpiece rather than an eyesore.
Essential Tools for Clean Cable Management
Before unplugging any cables, gather the right tools. Having these inexpensive accessories on hand will make the process much smoother:
- Hook-and-Loop (Velcro) Straps: Highly reusable and easy to adjust when you add new hardware.
- Zip Ties: Perfect for permanent, tight binds, especially in hidden crevices.
- Flush Cutters: Essential for clipping the tails of zip ties cleanly without leaving sharp edges.
- Adhesive Cable Tie Mounts: Small plastic squares that stick to the case chassis, providing extra anchoring points where built-in loops are missing.
- Cable Combs: Small plastic clips that keep individual wires in custom-sleeved cables perfectly parallel.
Step-by-Step Guide to Routing Your Cables
Achieving a clean build requires patience and a specific order of operations. Follow this step-by-step workflow to organize your system efficiently:
1. Prep the Case and Power Supply
If you are rebuilding an existing PC, unplug all external cables and remove both side panels. If you have a modular power supply (PSU), plug in only the cables you absolutely need (e.g., 24-pin ATX, 8-pin CPU, PCIe for the GPU, and necessary SATA power). Leave the unused cables in the PSU box to eliminate unnecessary bulk from the start.
2. Route the Large Power Connectors First
Always start with the thickest, least flexible cables, as they dictate how much room is left behind the motherboard tray:
- The 24-Pin ATX Cable: Route this through the grommet closest to the right edge of the motherboard. Pull the excess slack back into the rear chamber.
- The 8-Pin EPS (CPU) Cable: This cable powers the processor. Route it up the back of the case and through the cutout at the very top-left corner of the motherboard tray before installing large CPU coolers.
- The PCIe Cables: Route these through the PSU shroud cutouts directly beneath the graphics card, or from the side grommets, depending on which path keeps the cable run shortest and straightest.
3. Manage Front Panel and Fan Cables
Front panel connectors (power switch, USB ports, audio jacks) and fan cables are thin but numerous. Run these along the outer edges of the motherboard tray. Use the small cutouts at the very bottom and top of the motherboard to keep them invisible from the front window.
4. Bundle and Secure Behind the Tray
Once everything is plugged in, move to the back of the case. Group cables traveling in the same direction into channels. Use Velcro straps to secure the main vertical trunk of cables down the center of the case. Tuck any remaining excess slack into the basement shroud next to the power supply.
Comparing Cable Management Solutions
Different securing methods offer distinct advantages depending on your budget, case size, and how often you change your hardware setup.
| Solution | Best Used For | Pros | Cons |
|---|---|---|---|
| Velcro Straps | Main cable channels, high-change areas | Reusable, adjustable, gentle on cables | Bulkier than zip ties |
| Zip Ties | Tight corners, permanent routing | Very low profile, inexpensive | Must be cut to make changes |
| Adhesive Mounts | Cases with few tie-down points | Adds routing paths anywhere | Adhesive can weaken over time |
| Cable Combs | Visible GPU and Motherboard runs | Stunning, clean, premium look | Purely aesthetic; tedious to install |
Real-World Scenarios
Scenario A: The Budget Non-Modular PSU Build
Imagine you are building in a budget case with a non-modular power supply. You have several unused SATA and Molex cables hanging loose. Instead of leaving them dangling in the middle of the case, bundle the unused cables tightly together using zip ties, and tuck them into the empty space inside the hard drive cage or the bottom shroud next to the PSU. Focus your routing efforts entirely on the main chamber to keep the airflow pathway from the front intake fans to the CPU cooler completely clear.
Scenario B: The RGB-Heavy Dual-Chamber Case
In a modern dual-chamber case packed with nine RGB fans, you face a massive web of 18 separate cables (9 PWM fan cables and 9 ARGB cables) plus multiple controller hubs. In this scenario, trying to tie everything in one giant bundle will prevent the side panel from closing. Instead, mount the controller hubs flat against the motherboard tray. Route the cables in flat, parallel bands rather than thick round bundles, utilizing the case's built-in routing channels and Velcro tie-downs to distribute the bulk evenly.
Common Mistakes to Avoid
- Pulling Cables Too Tight: Tension can damage the delicate pins inside motherboard headers or strain the solder joints on your components. Always leave a tiny bit of slack near the connection points.
- Ignoring the Back Panel Clearance: It is easy to make the front look gorgeous while creating a massive mountain of tangled wires in the back. If you force the back panel shut, you risk pinching wires or damaging SSDs mounted behind the motherboard.
- Routing Before Testing: Never fully tie down and zip-tie your cables until you have verified that the PC successfully boots to the BIOS. Finding a dead component after spending two hours meticulously managing cables is a painful experience.
PC Cable Management FAQ
Does bad cable management cause thermal throttling?
In extreme cases where cables completely block intake or exhaust fans, yes. However, in most modern chassis designs, minor cable clutter will only increase average temperatures by a few degrees Celsius rather than causing severe thermal throttling.
Is it safe to use plastic zip ties inside a PC?
Yes, plastic zip ties are completely safe. The interior of a PC does not reach temperatures high enough to melt or degrade standard nylon zip ties.
Are custom-sleeved cable extensions worth it?
Custom extensions look incredible, but they add extra length to your existing cables, which means you must manage and hide twice as much cable slack in the basement of your case. They are highly recommended for aesthetics but require extra patience to tuck away.
How do I manage cables in a Mini-ITX case?
In small form factor builds, space is at a premium. Use custom-length short cables if possible, opt for a fully modular SFX power supply, and utilize every small crevice under the motherboard or GPU to tuck away excess wires.
