

When a laptop starts sounding like a jet engine and running sluggishly, dust accumulation inside the cooling system is almost always the culprit. Ignoring these warning signs doesn't just throttle your performance; it risks permanent thermal damage to your processor, graphics card, and motherboard. This guide provides a safe, step-by-step walkthrough to clean your laptop fan, lower system temperatures, and restore optimal thermal efficiency.
Key Takeaways
- Static Safety First: Always disconnect power, remove the battery if possible, and ground yourself to prevent electrostatic discharge (ESD) from damaging delicate circuitry.
- Secure the Fan Blades: Never let compressed air spin the fan freely; spinning blades can generate reverse voltage and damage the motherboard's power delivery system.
- Avoid Household Vacuums: Standard vacuum cleaners generate massive amounts of static electricity and can easily destroy sensitive microchips.
- Set a Routine: Perform a quick external vent blowout every 3 months and a deep internal clean once a year, depending on your environment.
Why Laptop Overheating is a Silent Killer
Laptops pack high-performance processors and graphic chips into incredibly tight spaces. To keep these parts from melting, manufacturers rely on miniature cooling systems consisting of copper heat pipes, heatsink fins, and high-RPM exhaust fans.
Over time, these fans draw in dust, pet hair, and lint. This debris forms a thick, felt-like barrier across the copper heatsink fins, trapping hot air inside the chassis. When temperatures rise above safe operating limits (usually around 90°C to 100°C), your CPU initiates thermal throttling—intentionally slowing down to prevent physical destruction. If the temperature continues to rise, the laptop will abruptly shut down to protect itself. Over time, prolonged exposure to high heat degrades the solder joints under your chips, shortens battery health, and can cause permanent hardware failure.
The Two Cleanup Scenarios: Quick vs. Deep Clean
Depending on your technical comfort level and whether your laptop is still under warranty, you have two primary methods for clearing out dust. Below is a comparison to help you choose the right approach.
| Method | Difficulty | Risk Level | Best For | Warranty Impact |
|---|---|---|---|---|
| Quick Blowout (No Disassembly) | Very Easy | Very Low | Routine maintenance; light dust; sealed ultraportables. | None (Safe for warranties) |
| Deep Internal Clean (Chassis Opened) | Moderate | Medium | Heavy dust; laptops older than 1 year; loud fan noise. | May void warranty on some brands |
Scenario 1: The Pet Owner's Deep Clean
Consider Sarah, who owns a dual-fan gaming laptop and two long-haired cats. After 18 months, her laptop began thermal throttling during basic tasks, with temperatures hovering at 95°C. A simple external blowout wasn't enough because pet dander had woven into a dense carpet behind her heatsink. Opening the back panel allowed her to gently peel away the dust blockages, dropping her idle temperatures by 22°C and restoring her laptop's original performance.
Scenario 2: The Student's Routine Maintenance
Michael uses a thin ultraportable laptop for college. Because he carries it in a backpack, the intake vents frequently accumulate lint. Since his laptop is still under warranty and difficult to open, he performs a quick blowout every three months using short, controlled bursts of compressed air through the exhaust vents. This simple preventative measure keeps his system running quietly without risking physical damage or voiding his warranty.
Essential Tools for the Job
Before opening your laptop, gather the correct tools. Using improvised household items can permanently damage your system.
- Canned Compressed Air: The safest way to blow dust out of tight spaces.
- Precision Screwdriver Set: Most laptops use small Phillips (PH0 or PH00) or Torx (T5, T6) screws.
- Non-Conductive ESD Brush: A clean, soft-bristled makeup brush or an anti-static nylon brush works perfectly to dislodge stubborn dust.
- Isopropyl Alcohol (90% or higher): For cleaning off greasy residue or old thermal paste (if you plan to repaste).
- A Non-Conductive Probe or Toothpick: To hold the fan blades still while blowing air.
Step-by-Step Guide to Deep Cleaning Your Laptop Fan
If you have decided to perform a deep clean, follow these steps carefully to ensure a safe and successful process.
Step 1: Preparation & Static Safety
Shut down your laptop completely. Unplug the charger, remove any USB dongles, and place the laptop on a clean, flat, non-carpeted surface. To prevent static buildup, touch a grounded metal object (like a metal desk leg or appliance) before touching any internal components, or wear an anti-static wrist strap.
Step 2: Remove the Bottom Cover
Flip the laptop over. Carefully remove all screws from the bottom casing. Keep track of which screw goes where, as manufacturers often use different lengths for different spots; putting a long screw into a short screw hole can pierce the motherboard. Use a plastic prying tool or guitar pick to gently pop the plastic clips holding the case together, then lift off the panel.
Step 3: Disconnect the Battery
Locate the battery connector on the motherboard. Gently pull or pry the plug out of its socket. This cuts off all residual power to the motherboard, eliminating the risk of accidental short circuits if a screw or metal tool slips during the cleaning process.
Step 4: Secure and Clean the Fan
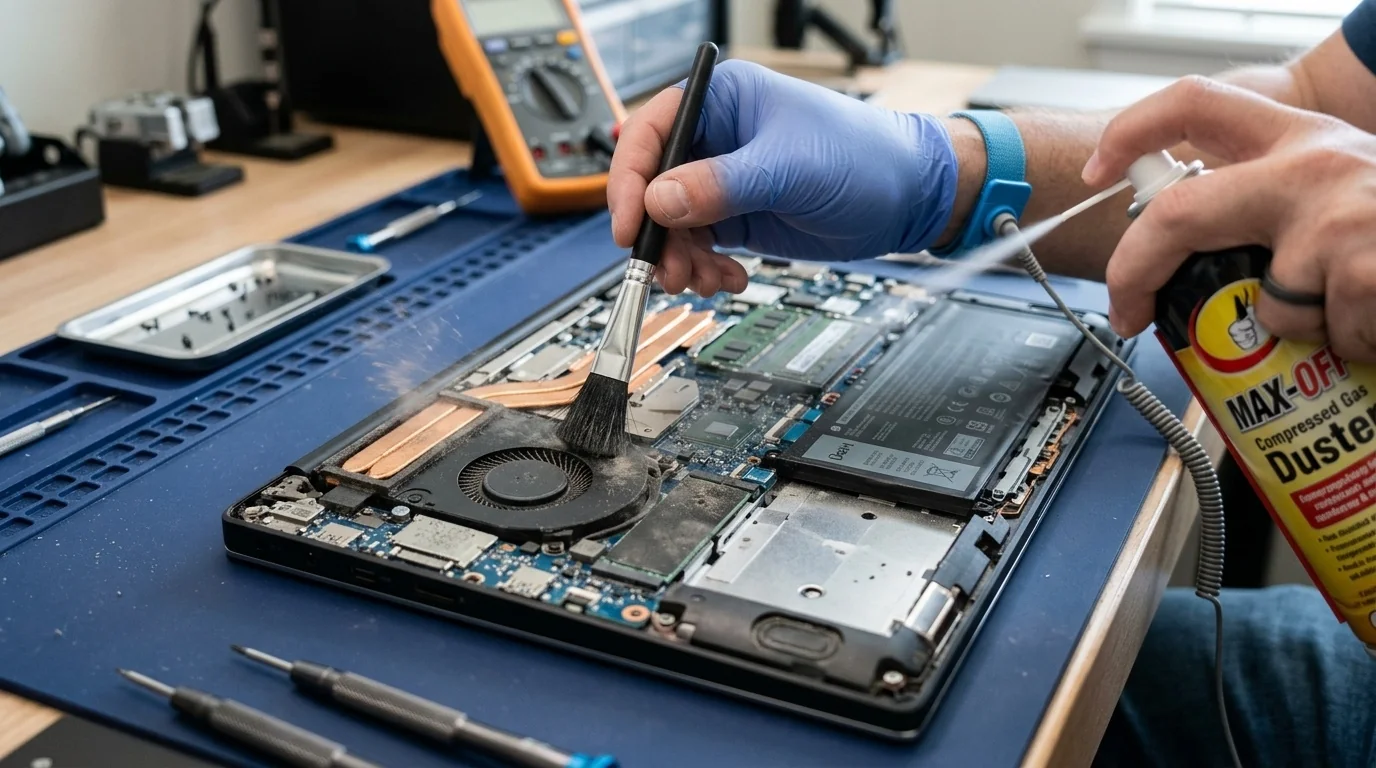
Locate the cooling fan. Before using compressed air, place a finger, toothpick, or plastic tool gently on the center of the fan blades to keep them from spinning. If you let high-pressure air spin the fan freely, it can act as a generator, sending an electrical current back into the motherboard and destroying sensitive components. Additionally, over-spinning can ruin the delicate bearings inside the fan motor.
Once secured, use short, controlled bursts of compressed air to blow dust out of the fan blades and the copper heatsink fins. Use your soft-bristled brush to sweep away any remaining dust clinging to the blades.
Step 5: Reassemble and Test
Once all dust has been cleared, plug the battery connector back into the motherboard. Carefully snap the bottom cover back into place and hand-tighten the screws. Turn on your laptop and listen for the fan. It should run significantly quieter, and your system should feel cooler to the touch during use.
Practical Ways to Prevent Future Dust Buildup
While you cannot keep dust out of your laptop entirely, you can significantly slow down its accumulation by adopting a few simple habits:
- Avoid Soft Surfaces: Never use your laptop on blankets, beds, carpets, or your lap. These soft surfaces act like dust magnets and block the bottom intake vents, forcing the fan to run at maximum speed and pull in loose fibers.
- Use a Hard Stand or Cooling Pad: Elevating your laptop slightly off your desk increases airflow and keeps the intake vents away from surface dust.
- Clean Your Workspace: Regularly wiping down your desk minimizes the ambient dust that your laptop's cooling system pulls in.
Frequently Asked Questions
Can I use a household vacuum cleaner to clean my laptop?
No. Standard vacuum cleaners generate massive amounts of static electricity on their plastic nozzles. Using one near delicate computer components can easily fry your motherboard. Additionally, the suction of a vacuum can pull up keycaps or spin fans too quickly, damaging their bearings.
How do I know if my laptop is overheating or just running normal demanding tasks?
It is normal for fans to spin loudly during gaming, video editing, or software installation. However, if your fans run at maximum speed during basic tasks like web browsing or watching a video, or if the laptop feels painfully hot to the touch and suddenly shuts down, your system is overheating and needs to be cleaned.
Will opening my laptop to clean the fan void my warranty?
This depends entirely on the manufacturer and your country's laws. In many regions (including the US under the Magnuson-Moss Warranty Act), simply opening your laptop's back cover to clean dust or upgrade RAM/storage does not void your warranty, provided you do not damage anything in the process. Check your manufacturer's specific warranty policy before opening the chassis.
How often should I clean my laptop cooling system?
For most users, a quick blowout of the vents with compressed air every 3 to 6 months is sufficient. If you live in a dusty environment, have pets, or smoke indoors, you should perform a full internal clean at least once a year to prevent dust from packing tightly behind the heatsink fins.
