

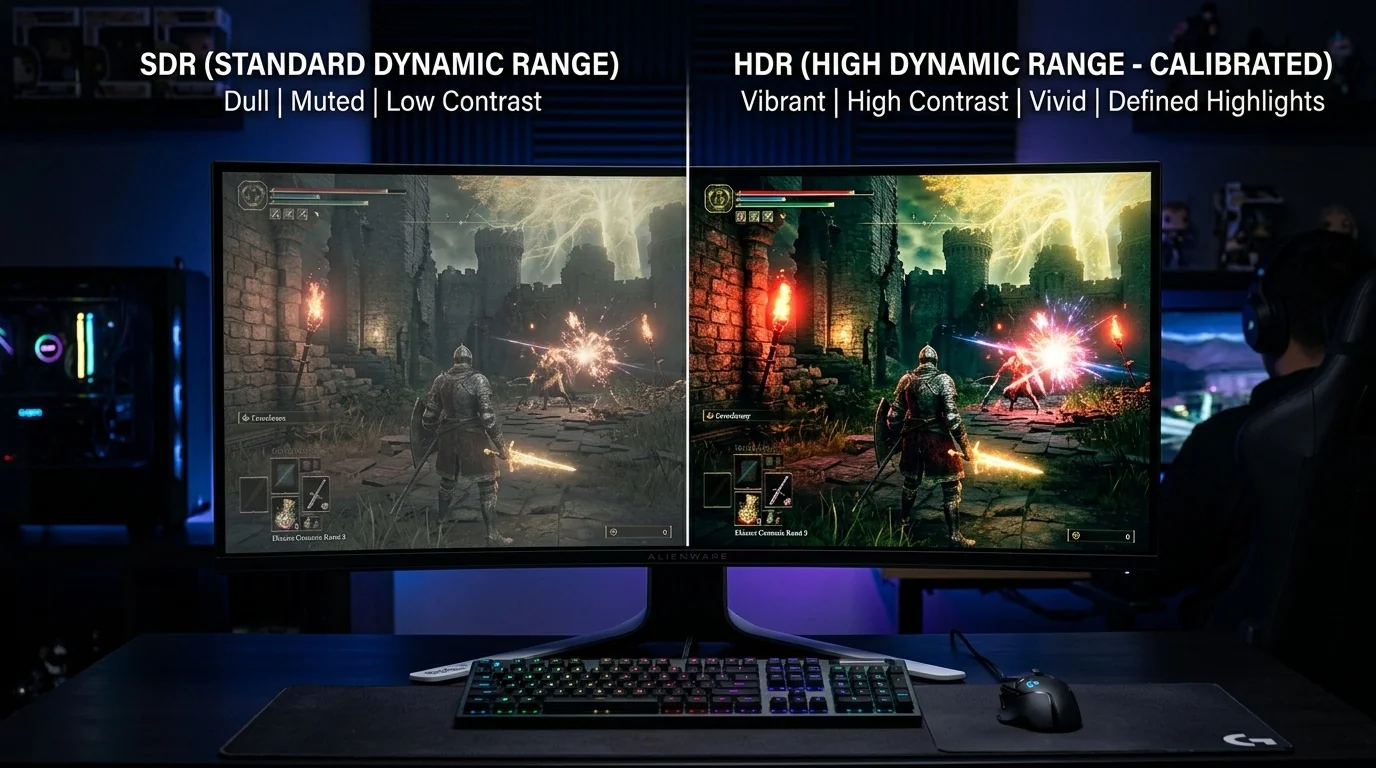
Many PC gamers toggle High Dynamic Range (HDR) in Windows 11 only to find their favorite titles looking washed out, overly dark, or unnaturally saturated. While Windows 11 offers vastly improved HDR support compared to older operating systems, achieving a truly vibrant, high-contrast gaming experience requires precise system-level calibration and the right display settings. This step-by-step guide will walk you through enabling HDR, using the official Windows HDR Calibration tool, and optimizing your hardware to unlock the full potential of your gaming monitor.
Key Takeaways
- Hardware is Foundation: True HDR requires a display with high peak brightness and local dimming (such as OLED, Mini-LED, or high-end FALD displays).
- System-Level Calibration: The free Windows HDR Calibration app is essential for setting correct luminance boundaries and preventing color clipping.
- Leverage Auto HDR: Windows 11 can automatically upgrade older DirectX 11 and 12 SDR games to convincing high dynamic range.
- Match Brightness Settings: Always coordinate your in-game HDR peak brightness settings with your monitor's actual calibrated capabilities.
Step 1: Verify Your Hardware and Connections
Before adjusting software settings, ensure your hardware chain is fully capable of handling an HDR signal. A weak link in your setup can cause the option to be greyed out or result in poor visual quality.
- The Display: Your monitor or TV should ideally carry at least a VESA DisplayHDR 600 certification. While DisplayHDR 400 monitors can accept an HDR signal, they often lack the local dimming zones and peak brightness required to show a meaningful difference over Standard Dynamic Range (SDR).
- The Cable: Use a High Speed HDMI 2.0/2.1 cable or a DisplayPort 1.4 (or newer) cable. Older cables lack the bandwidth required to carry high refresh rates, 10-bit color depth, and HDR data simultaneously.
- GPU Drivers: Ensure your NVIDIA, AMD, or Intel graphics drivers are updated to the latest version, as driver-level bugs frequently interfere with Windows display detection.
Step 2: Enable HDR in Windows 11 Settings
Once your hardware is verified, you must activate HDR within the Windows operating system. Follow these steps to turn the feature on:
- Right-click an empty space on your desktop and select Display settings.
- If you use multiple monitors, select your HDR-capable display at the top of the menu.
- Scroll down to the Brightness & color section and toggle the switch next to Use HDR to On.
- Click on the Use HDR banner to open the advanced HDR settings sub-menu.
- Ensure that both Play streaming HDR video and Use HDR are enabled.
Your screen may flicker black for a second as the display mode changes. Do not worry if your desktop suddenly looks slightly different; we will fix the color balance in the next steps.
Step 3: Calibrate Your Monitor with the Windows HDR Calibration App
By default, Windows sends a generic HDR signal that might not match your monitor's physical limitations. This leads to "clipping," where bright details (like clouds or explosions) blend into a solid white blob, or dark shadows turn into solid black blocks. To solve this, Microsoft developed the Windows HDR Calibration app.
- Open the Microsoft Store, search for Windows HDR Calibration, and download the official app.
- Launch the app and click Get started.
- Minimum Luminance (Black Level): Adjust the slider until the grey pattern just barely disappears into the black background. This ensures your display produces the deepest possible shadows without crushing dark details.
- Maximum Luminance (Peak Brightness): Adjust the slider until the pattern disappears into the white background. This tells Windows exactly when your monitor reaches its physical brightness limit.
- Max Full Frame Luminance: Repeat the process on the full-screen white test pattern.
- Color Saturation: Adjust the slider to your preference. Leaving it at 0 provides natural, color-accurate rendering, while sliding it up increases color vibrancy for a more saturated look.
- Name your profile (e.g., "My Monitor calibrated HDR") and click Finish to apply the system-wide color profile.
Step 4: Enable Auto HDR for Older Games
One of the best gaming features in Windows 11 is Auto HDR. This system uses machine learning to convert older DirectX 11 and DirectX 12 SDR games into high-quality HDR images on the fly, without requiring developers to release an official patch.
To enable this, return to the Settings > System > Display > HDR menu and toggle Auto HDR to On. When you launch a supported game, a small notification toast will appear in the corner of your screen confirming that Auto HDR is active. You can press Win + G during gameplay to open the Xbox Game Bar and adjust the Auto HDR intensity slider to fine-tune the effect.
Understanding the Differences: Native HDR vs. Auto HDR vs. SDR
Not all HDR implementations are created equal. Use the table below to understand how different rendering modes compare in terms of visual fidelity and system impact:
| Feature / Mode | SDR (Standard) | Auto HDR (Win 11) | Native HDR (In-Game) |
|---|---|---|---|
| Color Depth | 8-bit (16.7 million colors) | Upgraded to 10-bit color space | True 10-bit or 12-bit native master |
| Contrast Range | Limited (Standard contrast) | Expanded via OS-level algorithm | Maximum range designed by developers |
| System Overhead | None (Baseline) | Extremely minimal GPU overhead | Varies; can slightly impact frame rates |
| Game Compatibility | Universal | Thousands of DX11 & DX12 titles | Only titles with explicit HDR support |
Two Common Scenarios in Practice
Scenario A: Gaming on a Premium OLED TV (e.g., LG C-Series)
If you connect your PC to a modern OLED TV, you have access to self-emissive pixels that can turn completely off. To get the best image, turn off any "Dynamic Tone Mapping" settings in your TV's picture menu and set the input mode to HGIG (HDR Gaming Interest Group). This hands over all tone mapping duties directly to Windows 11. Run the Windows HDR Calibration app next; you will notice the maximum luminance clipping point sits perfectly around 800 nits, which is the native limit of most modern OLED panels.
Scenario B: Gaming on an Entry-Level IPS Monitor (DisplayHDR 400)
If you are using a budget monitor with an edge-lit backlight and a DisplayHDR 400 rating, enabling HDR can sometimes make the image look worse than SDR. Because the monitor cannot dim specific parts of the screen individually, turning on HDR simply pushes the entire backlight to its maximum brightness, raising black levels to a hazy grey. In this scenario, you may want to compare calibrated HDR against standard SDR with in-game color vibrance turned up to decide which presentation looks cleaner to your eyes.
Step 5: Adjusting In-Game Settings Correctly
Even with a calibrated Windows profile, many games feature their own internal HDR menus. To prevent the two calibration layers from fighting each other, follow these rules of thumb:
- Turn off Auto HDR if Native HDR is available: Native HDR is always preferable because the game engine renders lighting data directly. If a game has its own HDR toggle, use it and let Windows turn off Auto HDR for that specific session.
- Match the Nit Values: When an in-game menu asks for "Peak Brightness (Nits)," input the exact value you recorded during the Windows HDR Calibration app process (typically 400, 600, 800, or 1000+ nits depending on your screen).
- Avoid Double-Processing: Turn off features like "Dynamic Contrast" or "Contrast Enhancers" in your monitor's hardware OSD (On-Screen Display) menu, as they override your system calibration.
Frequently Asked Questions
Why does my desktop look washed out when HDR is enabled?
This usually happens because the "SDR content brightness" slider in your Windows HDR settings is set too low, or your monitor's color temperature is set to a cool preset. Adjust the SDR brightness slider to match your room lighting, and ensure your monitor's internal hardware profile is set to "Warm" or "D65" for accurate color rendering.
Does HDR affect my PC's gaming performance?
Generally, native HDR has a negligible performance cost (usually less than 1-2% FPS loss) because modern graphics cards process color math at 10-bit depths natively. Auto HDR also runs at a system level with almost zero perceptible impact on your frame rates.
Should I use HDMI or DisplayPort for HDR gaming?
Both can carry HDR signals perfectly, but it depends on your specific version. DisplayPort 1.4 or newer is ideal for dedicated PC monitors. If you are gaming on a 4K TV, HDMI 2.1 is required to support high-refresh-rate 4K gaming (120Hz+) alongside HDR and uncompressed 10-bit color.
What is the difference between HDR10 and Dolby Vision in PC gaming?
HDR10 is the open, system-wide standard used by Windows 11 and almost all HDR monitors. Dolby Vision uses dynamic metadata to adjust brightness frame-by-frame, but its support in PC games is extremely rare. For almost all PC setups, calibrating for HDR10 is the primary goal.
